
Start by creating a “Frame 6” shape using the custom shape tool.

From “Filter” menu select “Liquify”. Select the forward warp tool and distort the shape as shown in the image below.

Double click the layer to open the layer style window. Apply settings as shown.


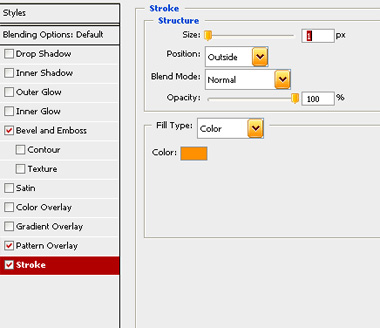
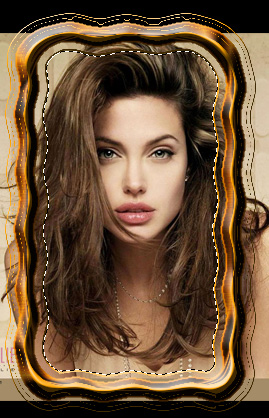
If you have chosen your settings correctly, it should look similar to what I have below.

Duplicate the layer and change the layer mode to “Hard Light”.

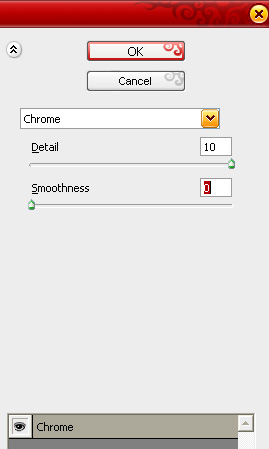
Hold down the Ctrl button and click the layer thumbnail to get the selection. Press Q to enable quick mask. From “Filter” menu select “Sketch>>Chrome”. Apply settings as shown.
Press Q again to disable quick mask.


Select and merge all the frame layers. Double click the layer to open layer style window. Apply settings as shown.

Insert an image of your choice. Move this layer below all the layers in layer order. Also in the layer palette, select frame layer, select magic wand tool and click in the center of the frame to get the selection.
Select image layer. Press Ctrl+Shift+I to inverse the selection. Press Delete.

